Transform data using a Mapping Data Flow in Azure Data Factory
In the previous articles, Copy data between Azure data stores using Azure Data Factory and Copy data from On-premises
data store to an Azure data store using
In this article, we will show how we can use the Azure Data Factory to transform a specific data set.
Data Transformation Overview
Azure Data Factory supports various data transformation activities. These activities include:
Mapping data flow activity: Visually designed data transformation that allows you to design a graphical data
transformation logic without the need to be an expert developer. The mapping data flow will be executed as an
activity within the Azure Data Factory pipeline on an ADF fully managed scaled-out Spark cluster
Wrangling data flow activity: A code-free data preparation activity that integrates with Power Query Online in order
to make the Power Query M functions available for data wrangling using spark execution
HDInsight Hive activity: Allows you to run Hive queries on your own or on-demand HDInsight cluster
HDInsight Pig activity: Allows you to run Pig queries on your own or on-demand HDInsight cluster
HDInsight MapReduce activity: Allows you to run MapReduce programs on your own or on-demand HDInsight cluster
HDInsight Streaming activity: Allows you to run Hadoop Streaming programs on your own or on-demand HDInsight
cluster
HDInsight Spark activity: Allows you to run Spark programs on your own HDInsight cluster
Machine Learning activities: Allows you to use a published Azure Machine Learning web service for predictive
analytics
Stored procedure activity: Allows you to execute a stored procedure in the Azure relational data platforms such as
Azure SQL DB and Azure SQL Data Warehouse
Data Lake Analytics U-SQL activity: Allows you to run a U-SQL script on an Azure Data Lake Analytics cluster
Databricks Notebook activity: Allows you to run a Databricks notebook in your Azure Databricks workspace
Databricks Jar activity: Allows you to run a Spark Jar in your Azure Databricks cluster
Databricks Python activity: Allows you to run a Python file in your Azure Databricks cluster
Custom activity: Allows you to define your own data transformation logic in Azure Data Factory
Compute environments
Azure Data Factory supports two compute environments to execute the transform activities. The On-demand compute environment, on which the computing environment is fully managed by the Data
factory, where the cluster will be created to execute the transform activity and removed automatically when the activity is completed. The second approach is Bring Your Own environment, where the compute
environment is managed by both, you and the Data factory.
Transform Data with Mapping Data Flows
Mapping Data Flows activity can be created individually or within an Azure Data Factory pipeline. In this demo, and in
order to test the Data Flow activity execution, we will create a new pipeline and create a Data Flow activity to be
executed inside that pipeline.
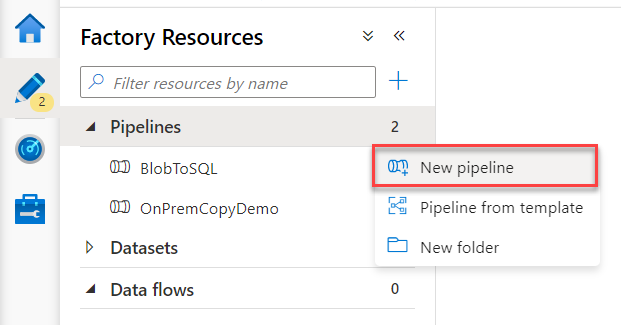
First, you need to open the Azure Data Factory using the Azure portal, then click on Author & Monitor option. From the opened Data Factory, click on the Author button then click on the
plus sign to add a New pipeline, as shown below:
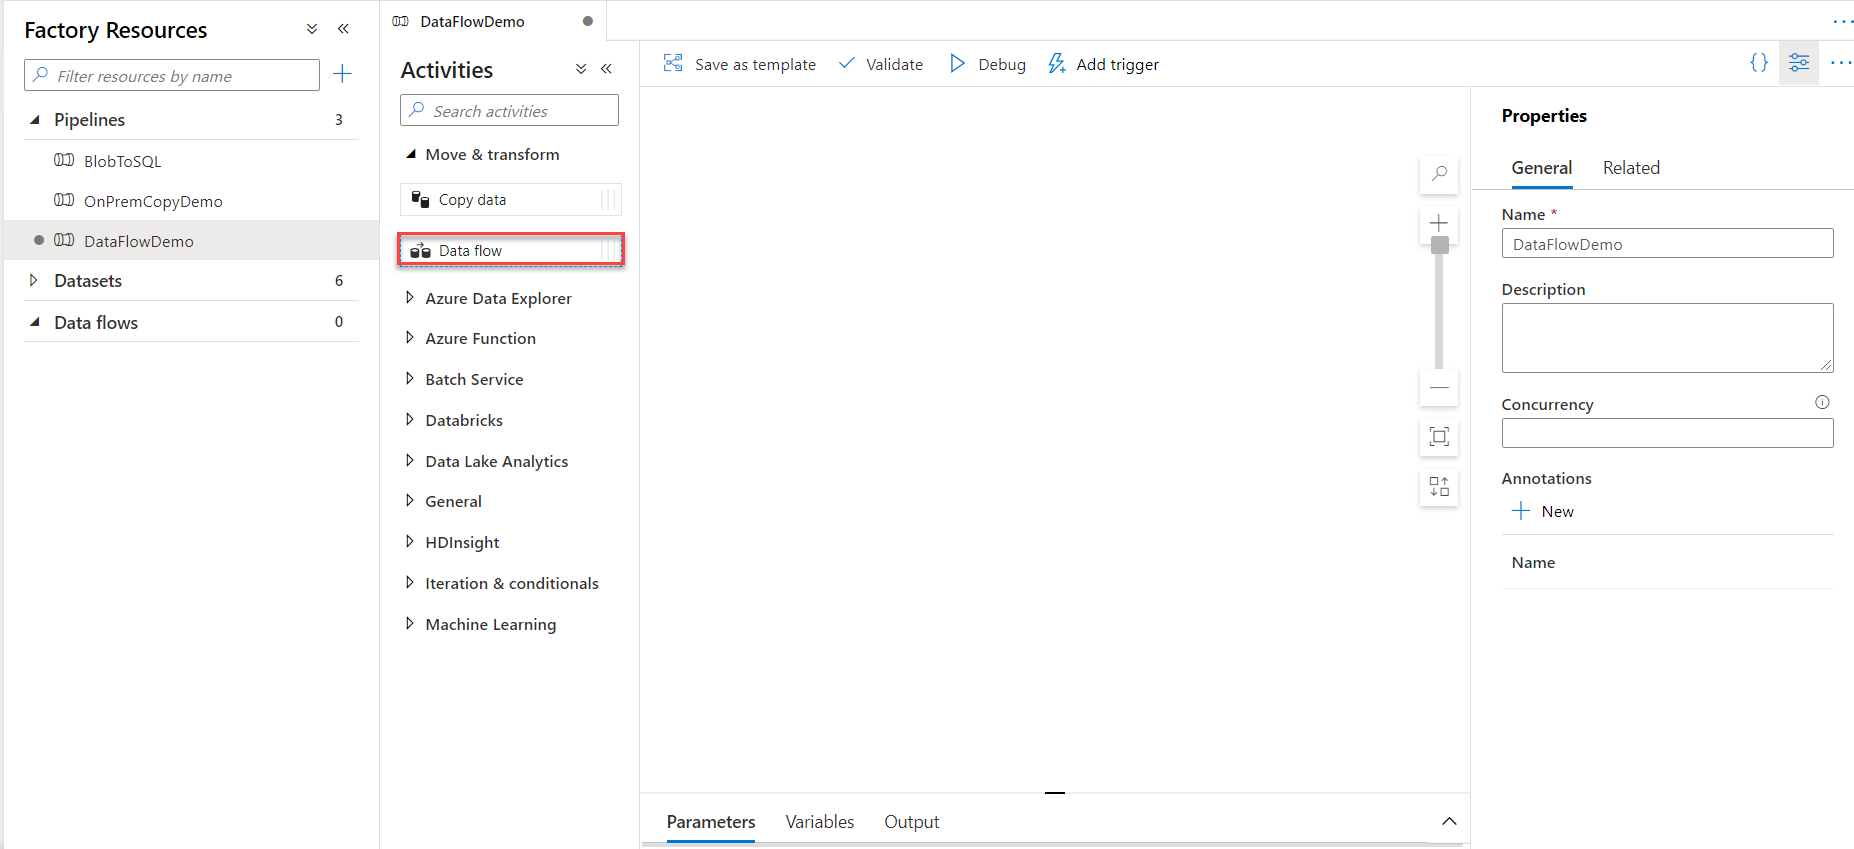
From the Pipeline design window, provide a unique name for the pipeline and drag then drop the Data Flow activity to
the design space and click on the Data flow activity, as below:
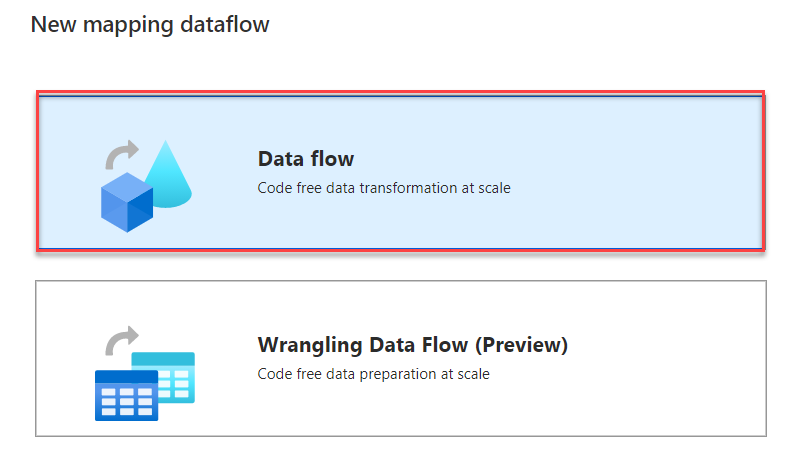
In the New Mapping dataflow window, choose to add a Data flow type, then click OK, as shown below:
The displayed Mapping Data Flow authoring canvas consists of two main parts: the graph that displays the
transformation stream, and the configuration panel that shows the settings specific to the currently selected
transformation.
The purpose of this Data Flow activity is to read data from an Azure SQL Database table and calculate the average
value of the users’ age then save the result to another Azure SQL Database table.
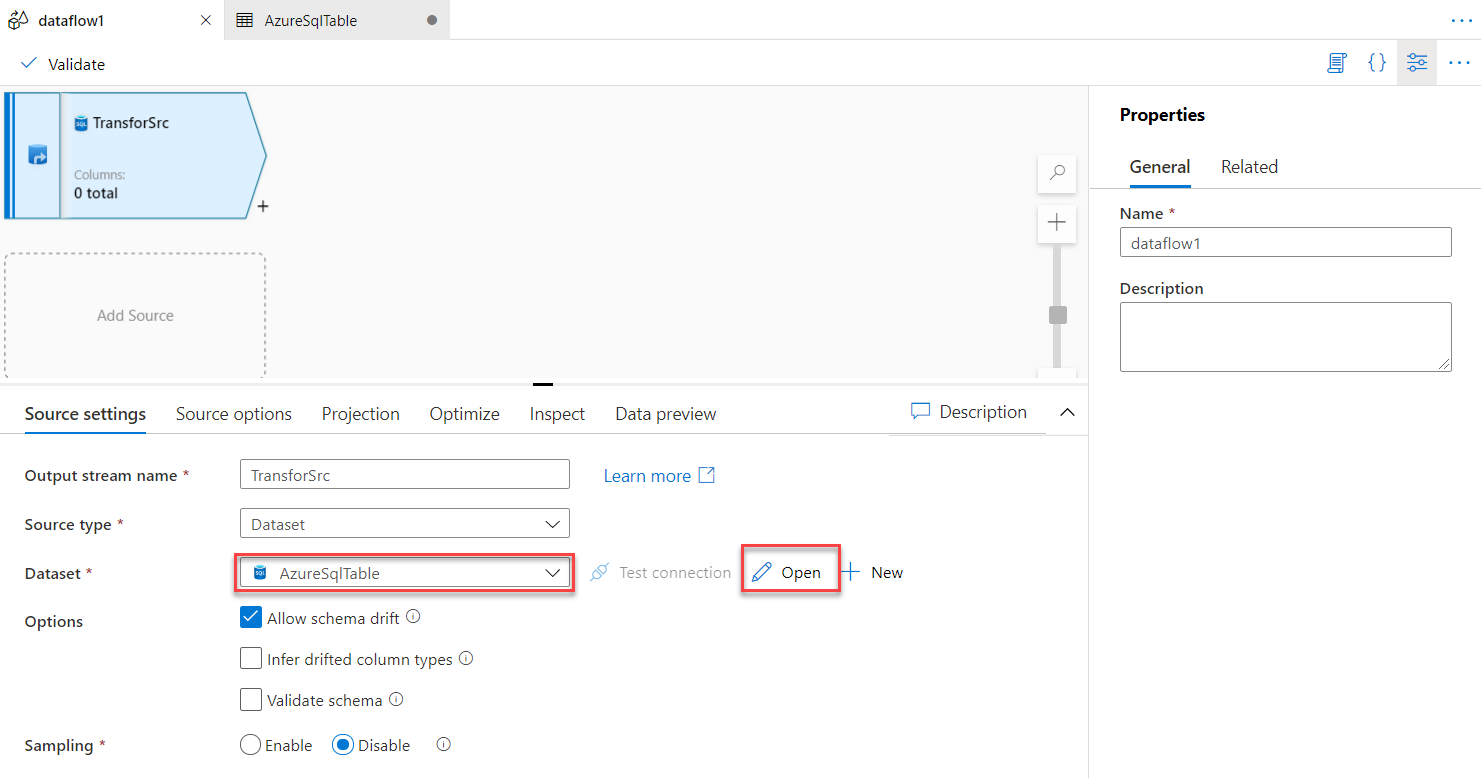
So, the first step is to specify a name for the source stream and the dataset that points to the source data. In this
demo, we will use the dataset that points to the Azure SQL Database table, as shown below:
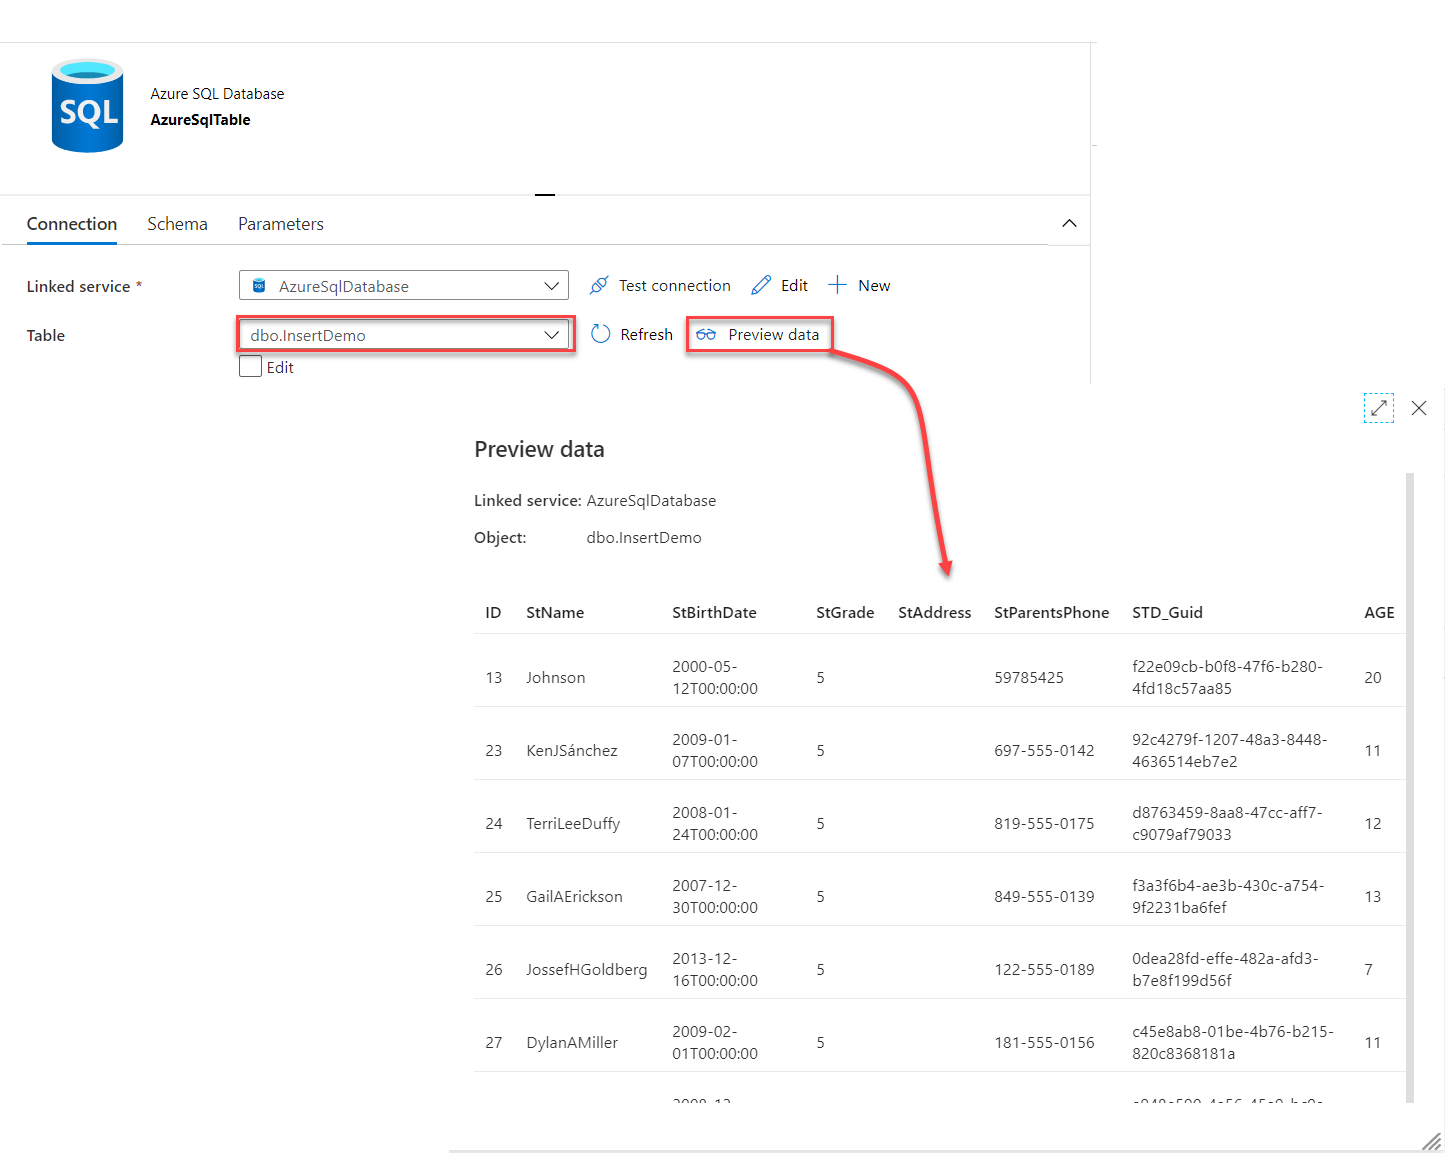
Opening the selected dataset, you can reconfigure the table name and validate the source data store connection and
data, as shown below:
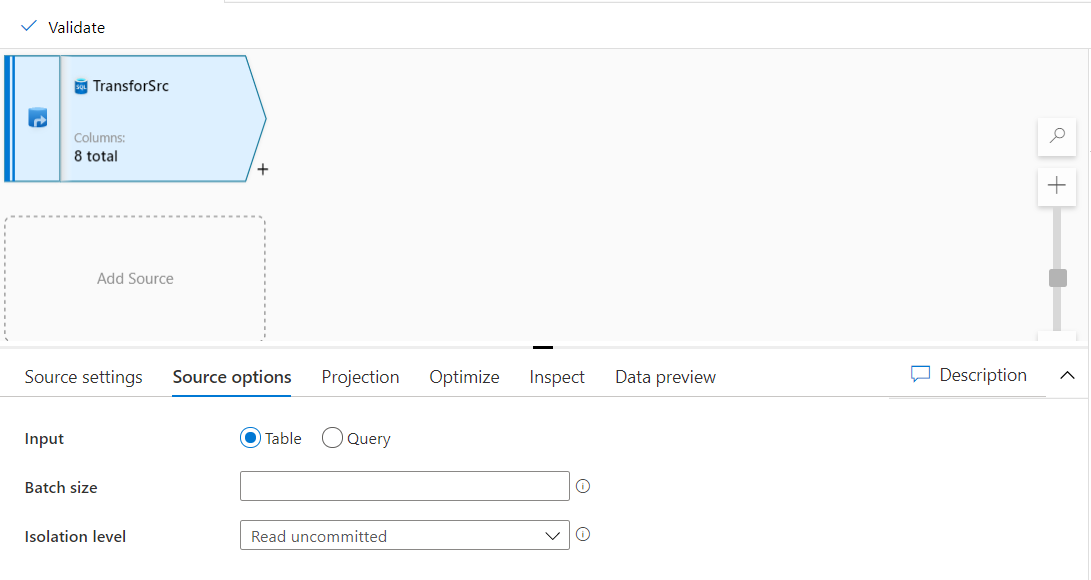
Under the Source options, you can specify whether to read data from the source table or provide a query to filter the
source data, in addition to the ability to override the default read batch size and the isolation level of the read
transaction, as shown below:
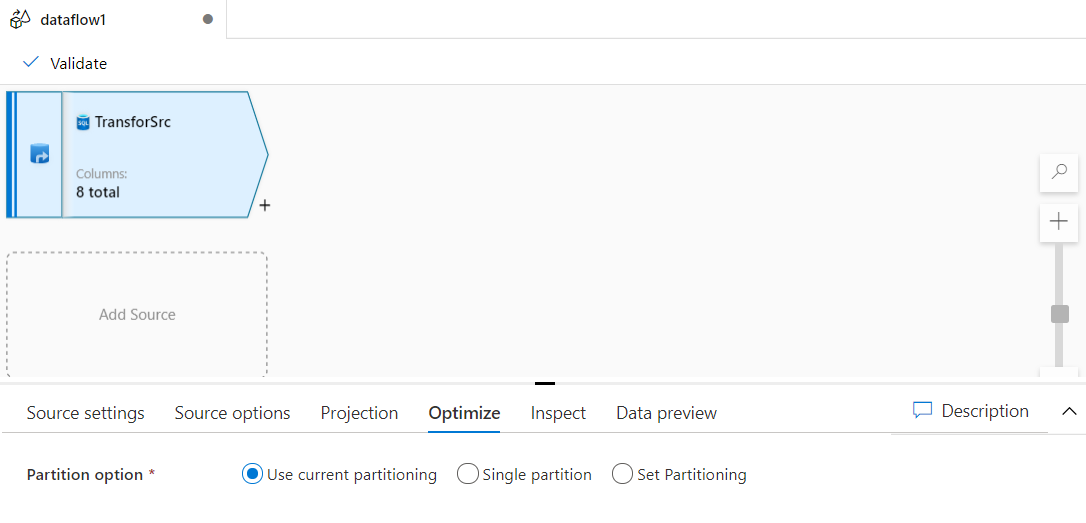
Also, you can choose the proper data partitioning option that can help to optimize the data reading and transformation
process, as below:
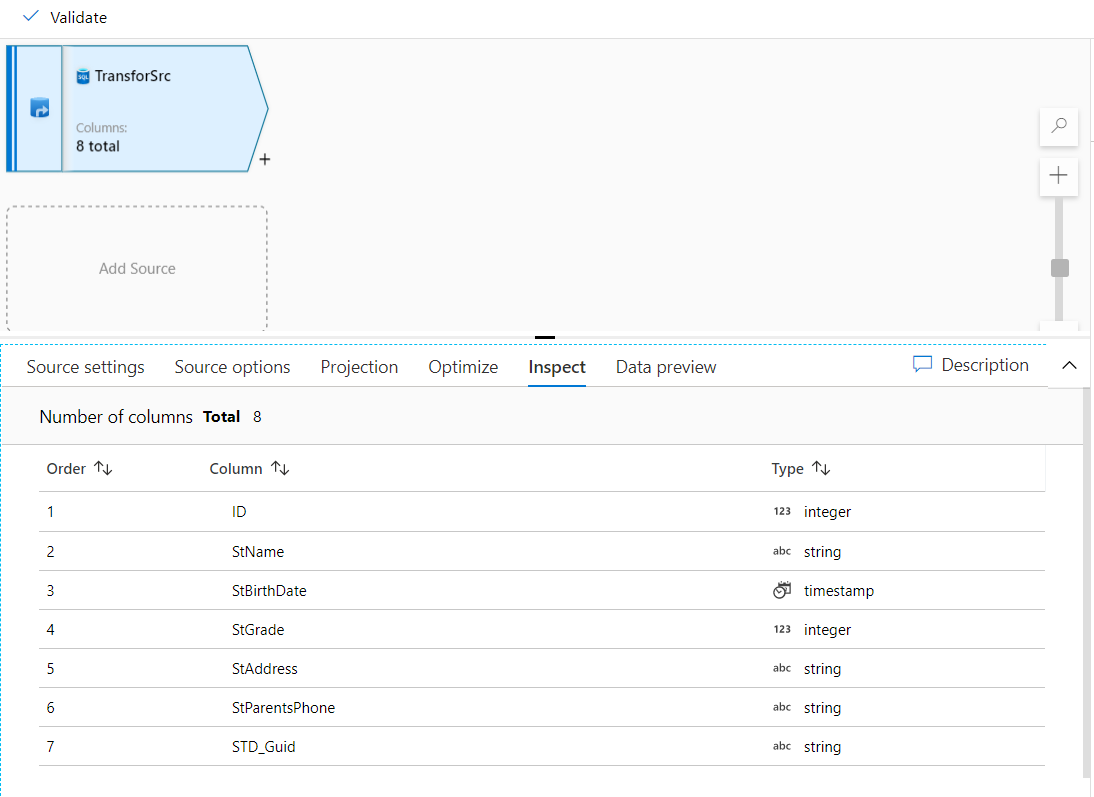
Under the Inspect tab, you can check the metadata of the data stream that you’re transforming. This
includes the column counts, the columns changed, the columns added, data types, the column order, and column
references, as shown below:
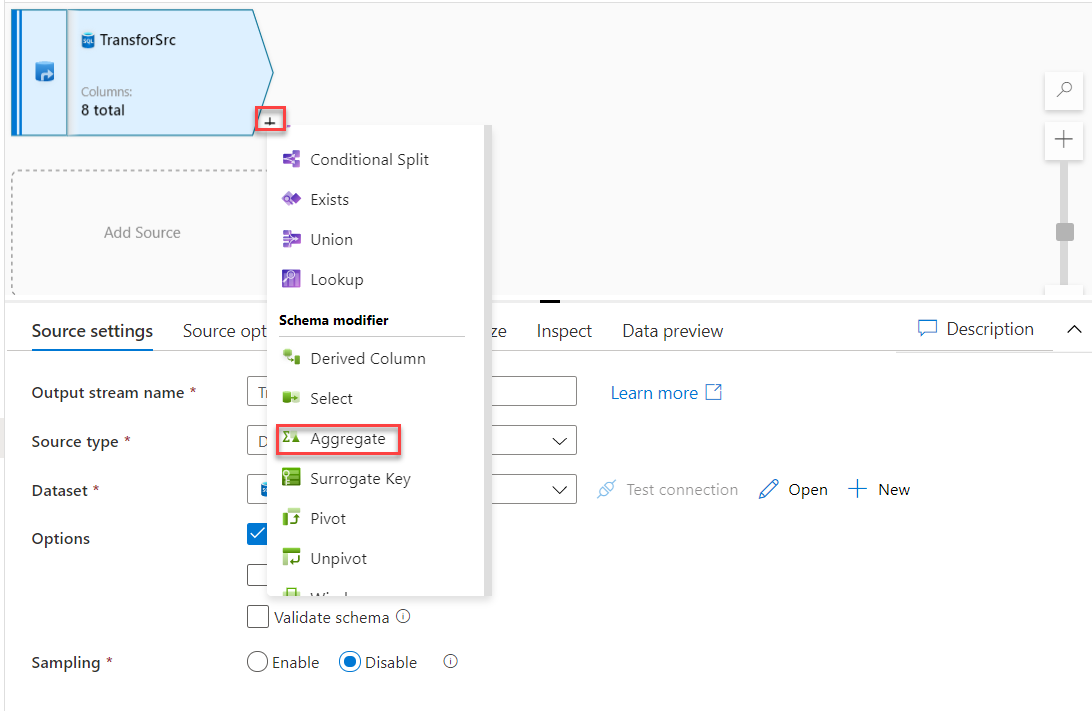
Now the data source is ready. We need to add a new stream to calculate the average value of the source data. To
achieve that, click on the plus sign in the graph area and choose to add Aggregate stream, as shown
below:
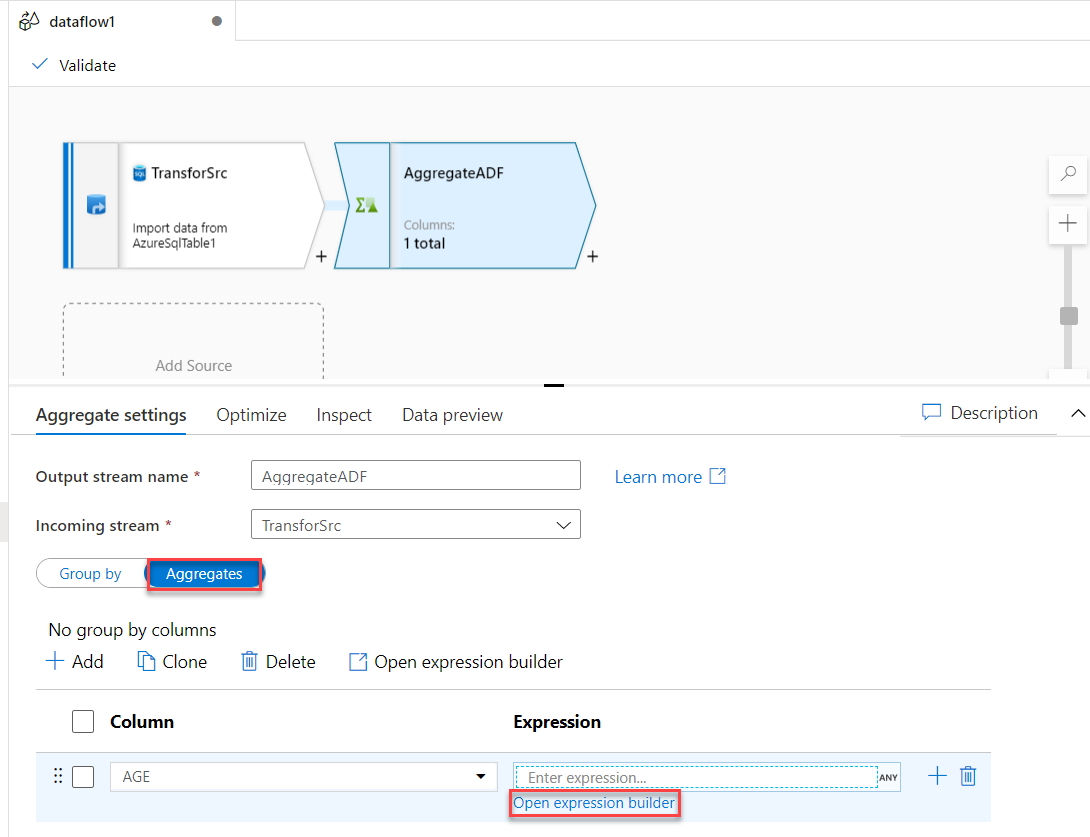
In the Aggregate stream settings, provide a meaningful name for the stream, change the stream from Group By to
Aggregates function, and provide the name of the column that will be used in the aggregate function
then click to open the expression builder, as shown below:
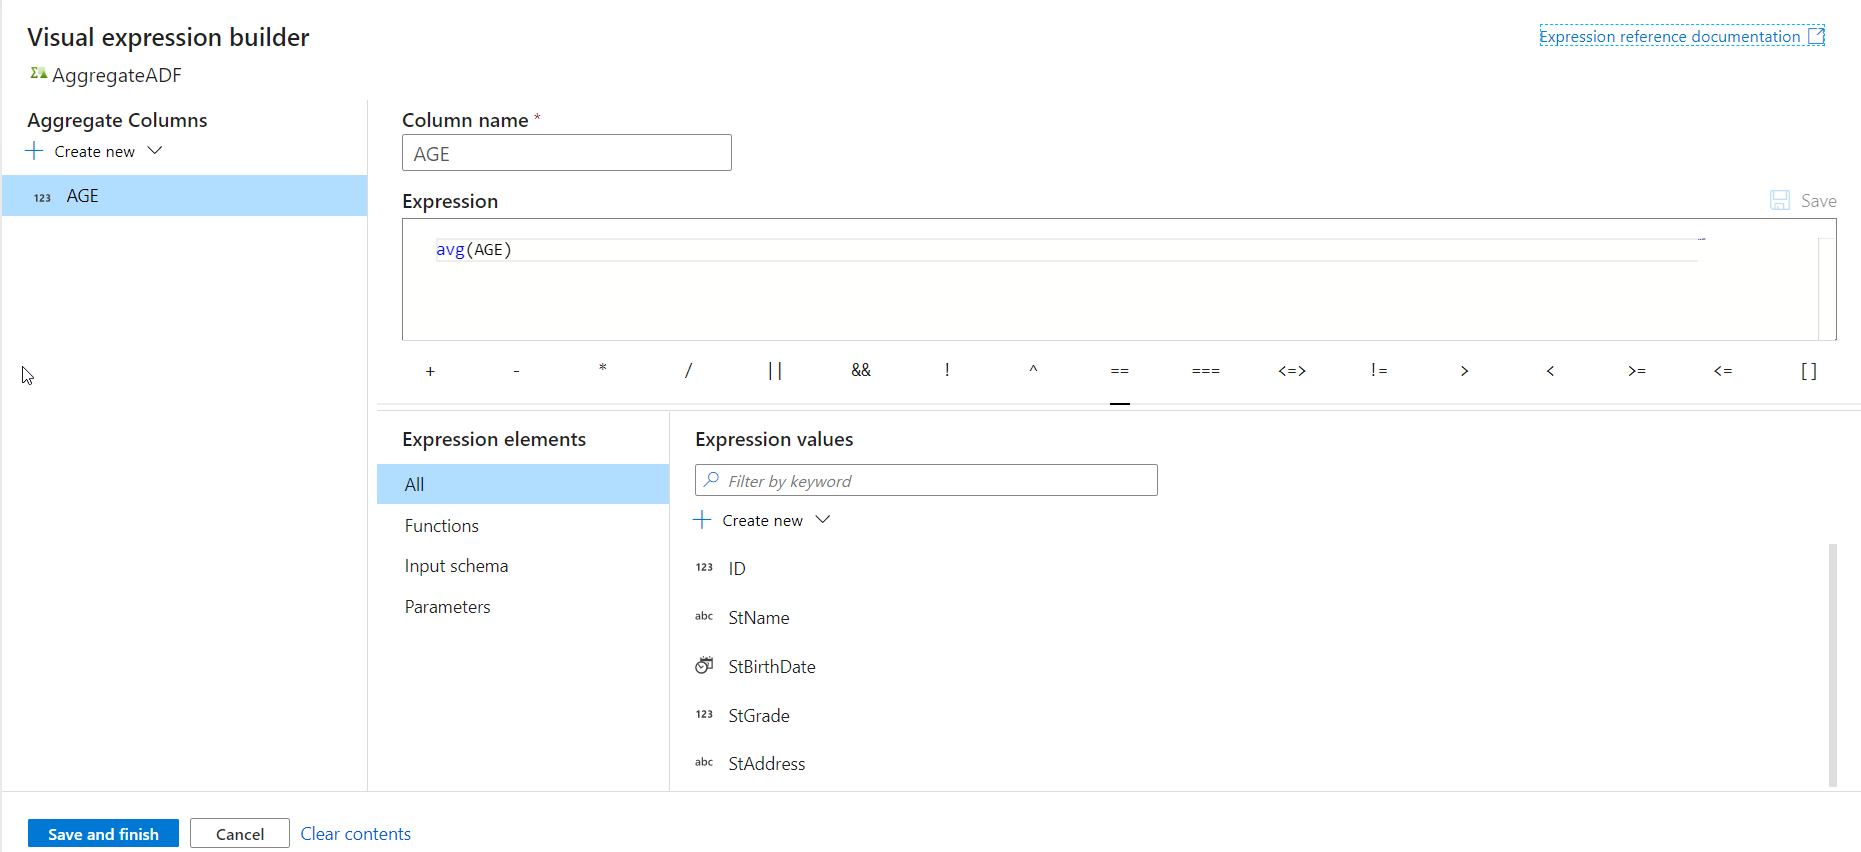
From the opened visual expression builder, specify the expression of the Average aggregate function that will be used
to calculate the average value of the users’ age, as shown below:
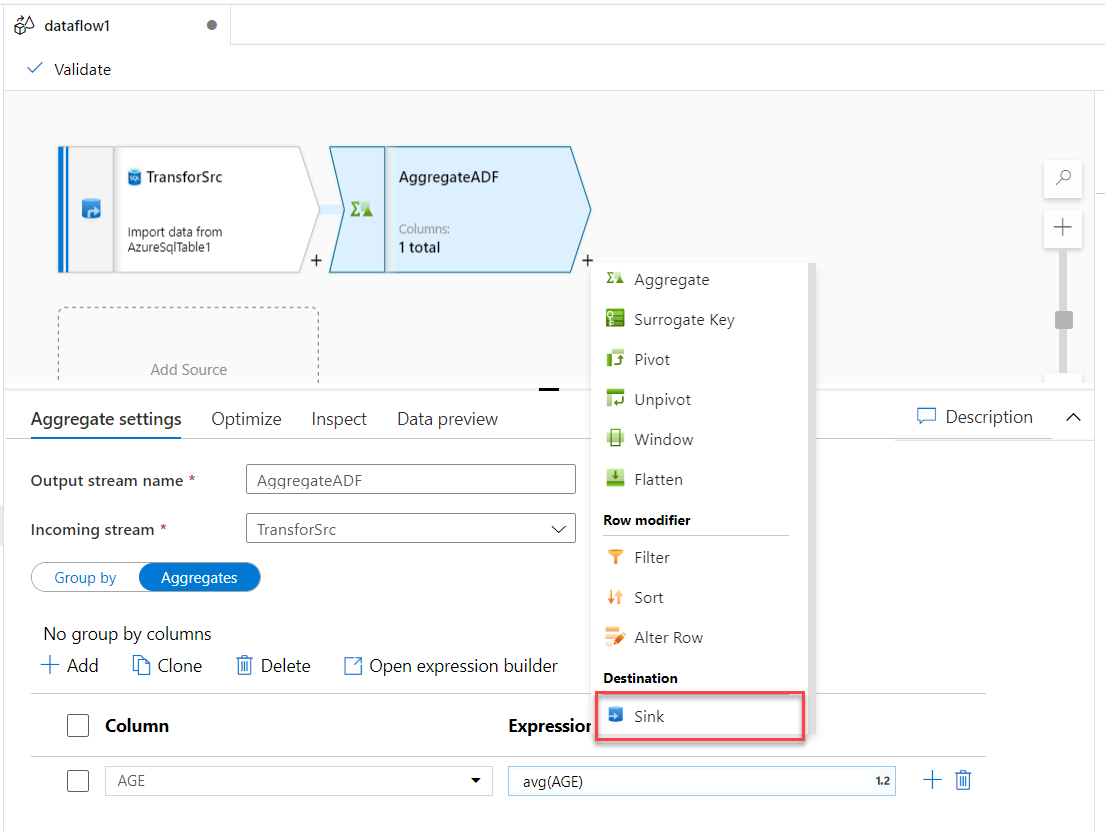
With the source data and the aggregate function streams configured successfully, we will add a sink to store the
transform function result. This can be achieved by clicking on the plus button and choose to add a Sink stream, as
shown below:
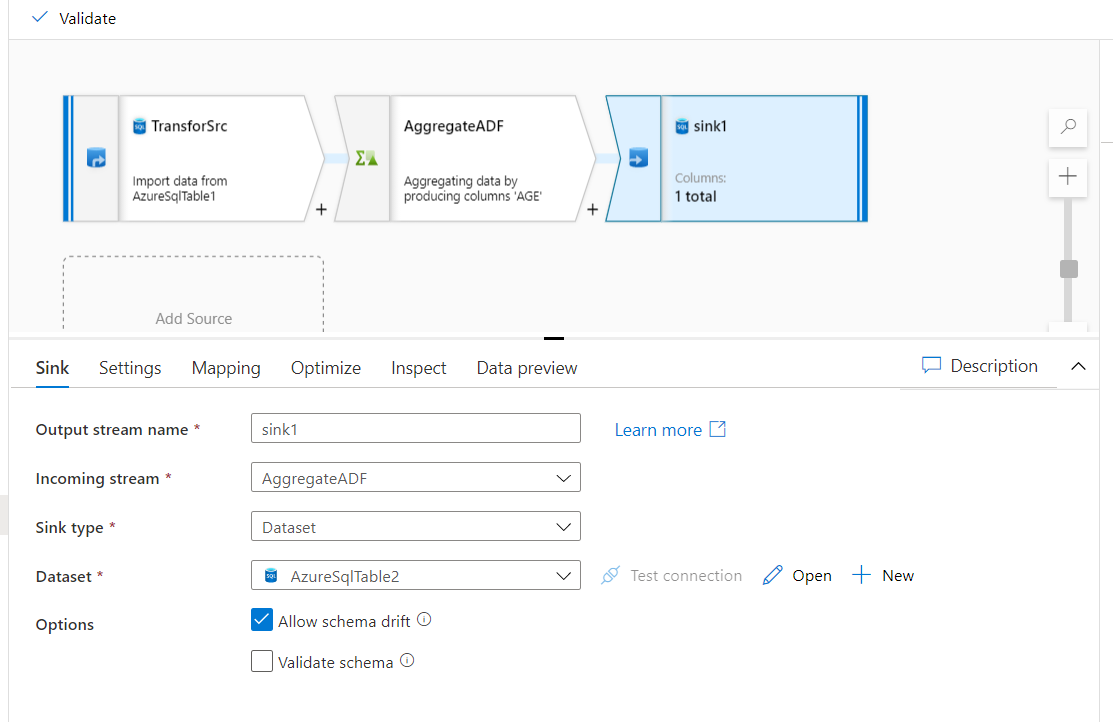
From the Sink stream settings, providing an indicative name for that stream and configure the dataset to point to the
same Azure SQL Database, but to store the aggregate function result in another table, as shown below:
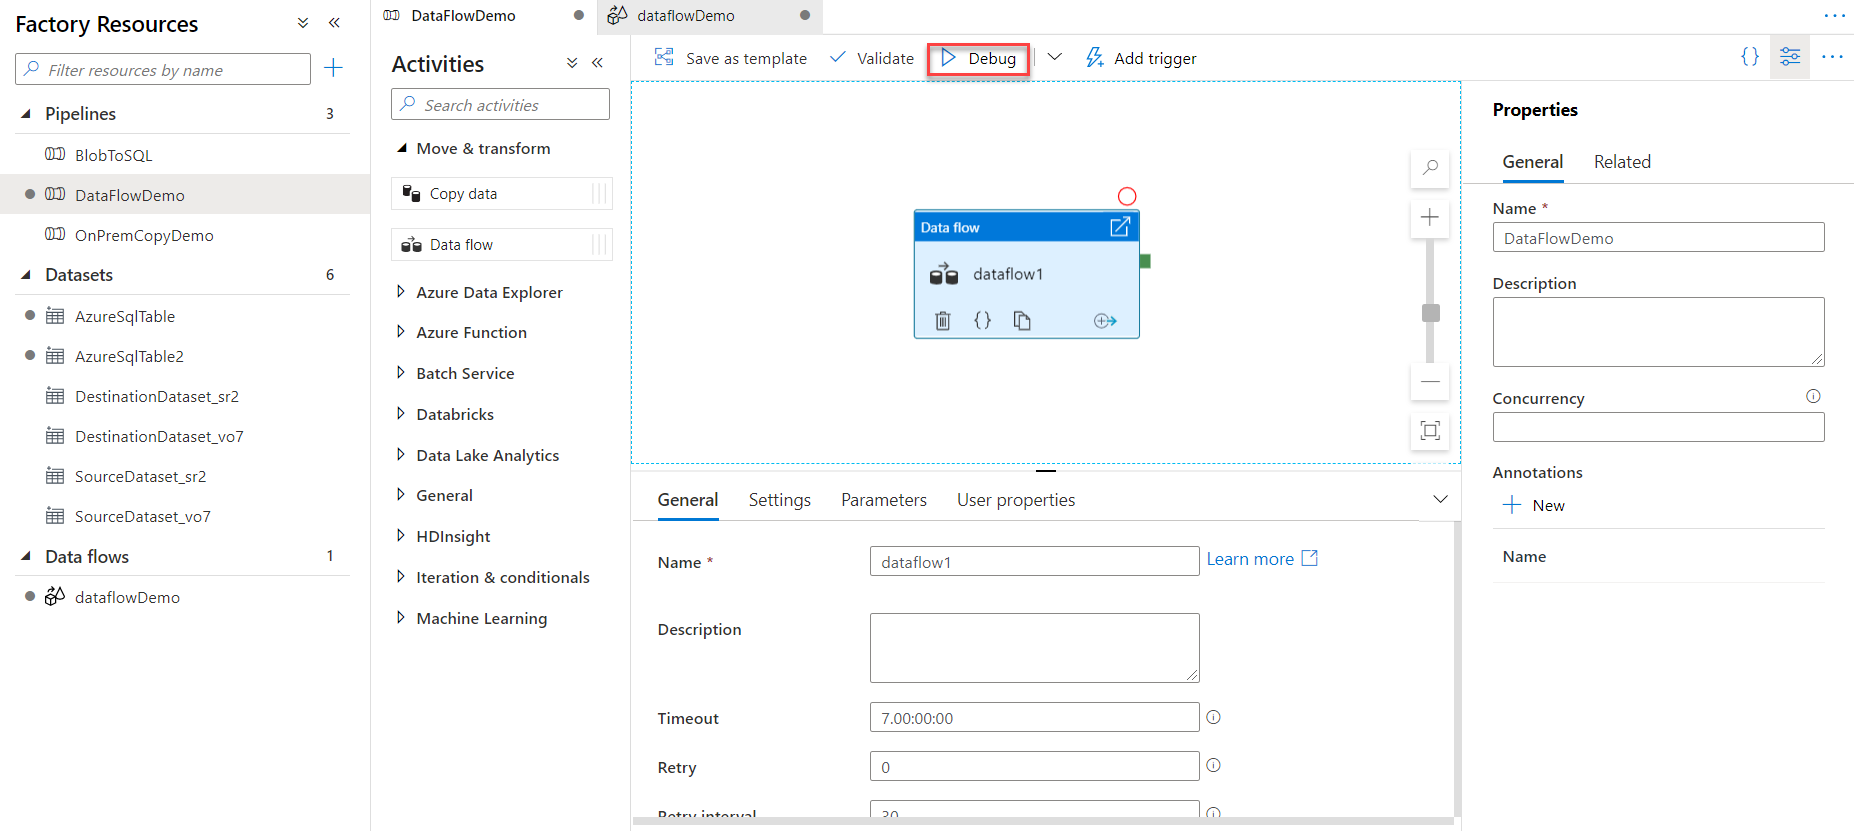
Data Flow activity is configured successfully now. Before publishing the pipeline changes, validate the pipeline then
run it using the Debug mode, where the Data Flow Activity will be executed manually under that pipeline, as shown
below:
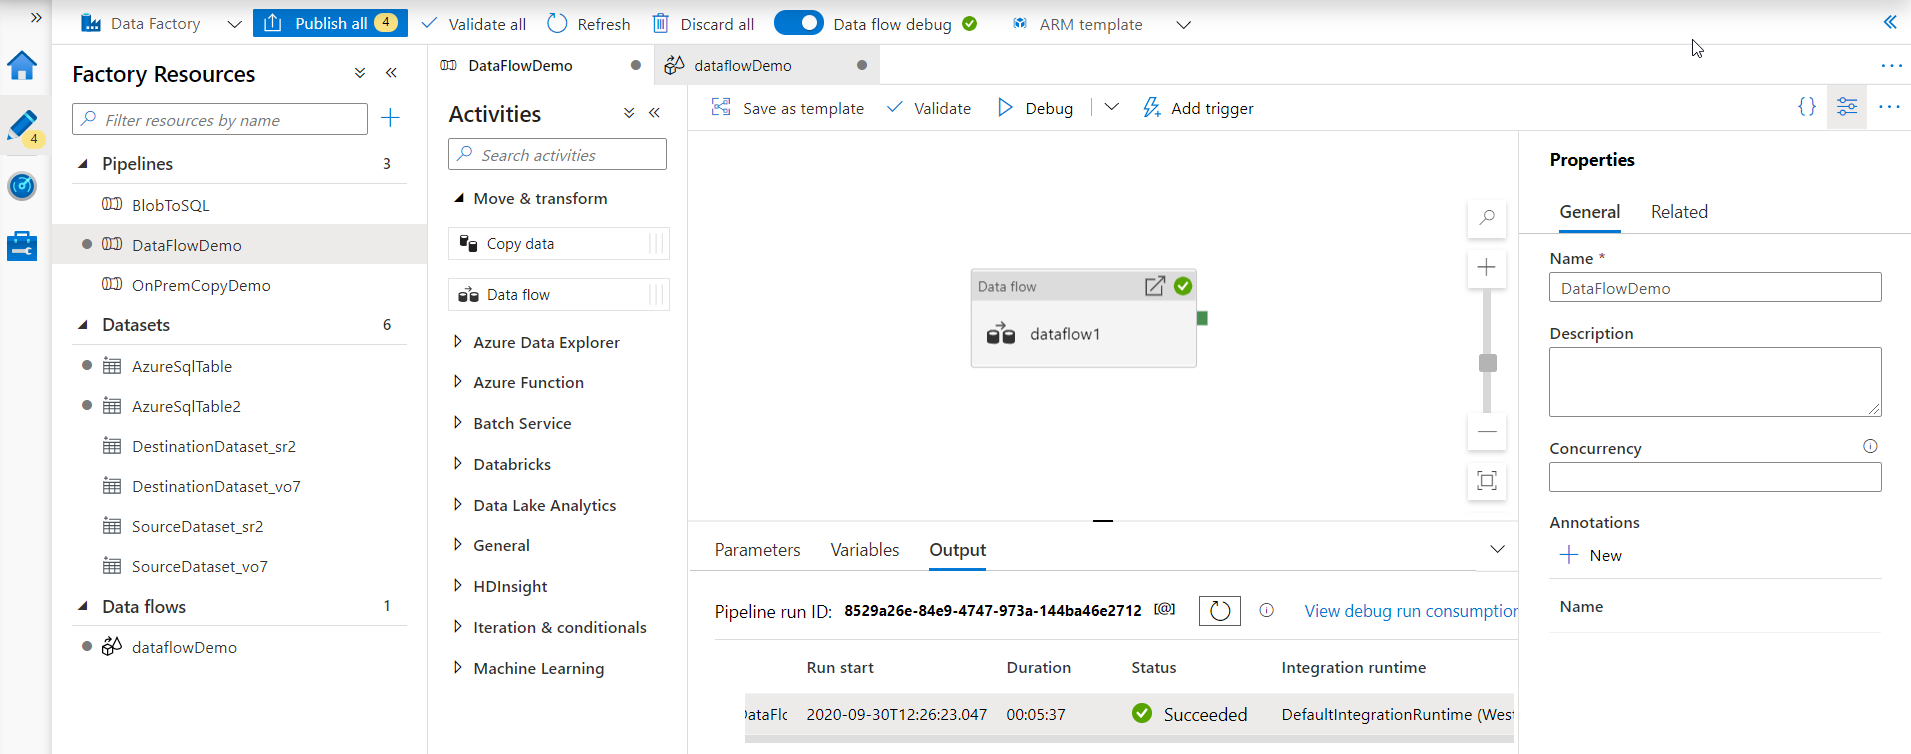
When the pipeline execution is completed, review the output tab and verify that it is executed successfully with no
issue. As you are still in the debug mode, you can fix any issue with the data sources, sinks and the transform
function within the Data Flow activity, as shown below:
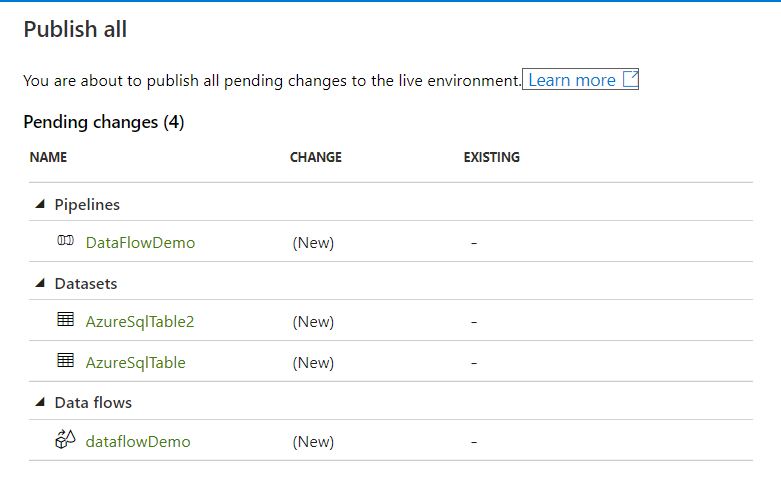
After verifying the pipeline components and execution result, you can easily click on the Publish All button to
publish the pipeline to the production environment. You can see from the snapshot below that the created pipeline, the
datasets and the Data Flow will be published to the current Azure Data factory, where you can easily create a trigger
and schedule it to be orchestrated based on the business requirements, as shown below:
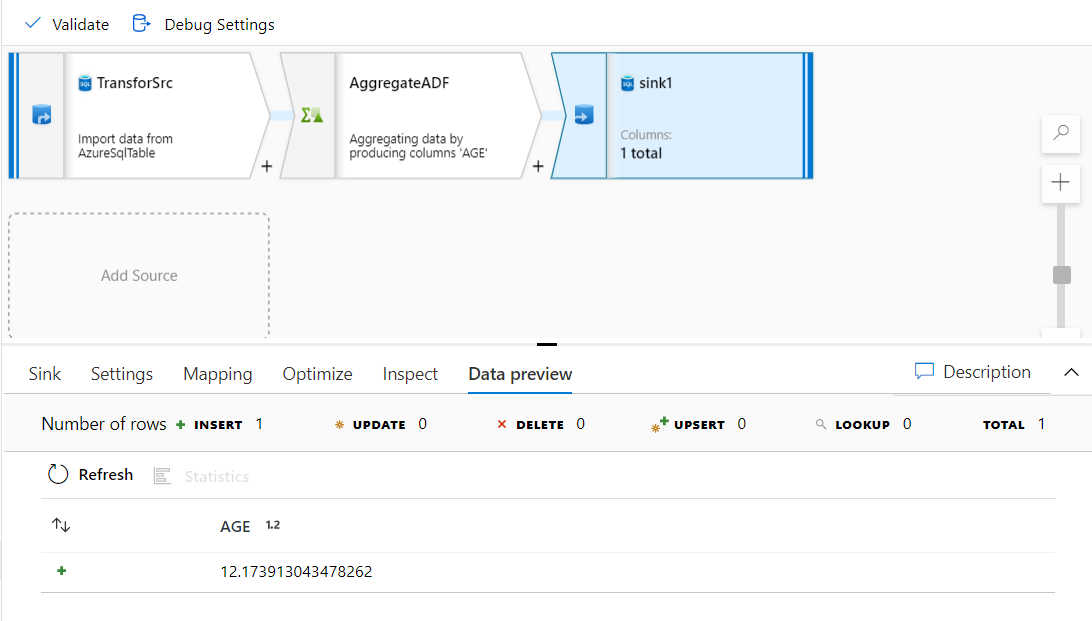
Take into consideration that, after executing the pipeline, you can click on the Sink stream and click on the Data
Preview option to validate the transform function result, which is the average value for the users’ ages, as shown
below:
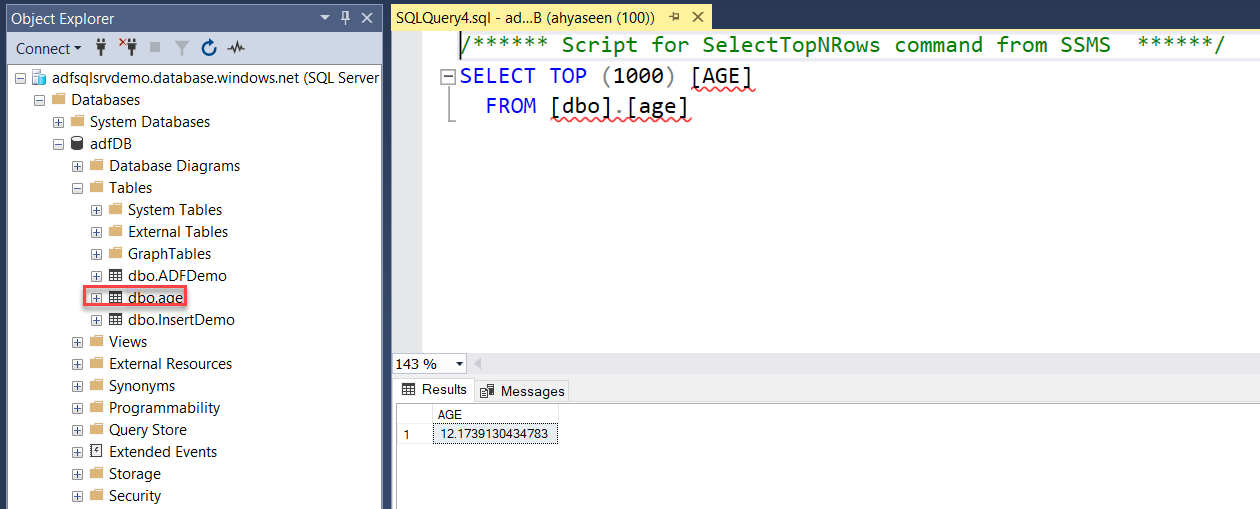
The same result can be verified by connecting to the Azure SQL Database using the SQL Server Management Studio (SSMS)
tool and browse for the new table then run the SELECT statement below, and you can see that this value stored in the
table matches the value verified from the sink data preview:
Conclusion
In this article, we went through a simple demo of how to use the Mapping Data Flow activity to transform your data and
store the result to be used later.
In the next article, we will show how to run an SSIS package in Azure Data factory. Stay tuned!
Table of contents
Ahmad Yaseen is a Microsoft Big Data engineer with deep knowledge and experience in SQL BI, SQL Server Database Administration and Development fields.
He is a Microsoft Certified Solution Expert in Data Management and Analytics, Microsoft Certified Solution Associate in SQL Database Administration and Development, Azure Developer Associate and Microsoft Certified Trainer.
Also, he is contributing with his SQL tips in many blogs.