Running and Passing Information to a Python Script
Tweet
Share
Share
Last Updated on December 29, 2021
Running your Python scripts is an important step in the development process, because
1.9k
By Nick Cotes
Last Updated on December 29, 2021
Running your Python scripts is an important step in the development process, because it is in this manner that you’ll get to find out if your code works as you intended it to. It is, also, often the case that we would need to pass information to the Python script for it to function.
In this tutorial, you will discover various ways of running and passing information to a Python script.
After completing this tutorial, you will know:
How to run a Python script using the command-line interface, the Jupyter Notebook or an Integrated Development Environment (IDE).
How to pass information to a Python script using the
sys.argv command, by hard-coding the input variables in Jupyter Notebook, or through the interactive use of the
input() function.
Let’s get started.
Running and Passing Information to a Python Script Photo by Andrea Leopardi, some rights reserved.
Tutorial Overview
This tutorial is divided into two parts; they are:
Running a Python Script
Using a Command-Line Interface
Using Jupyter Notebook
Using an Integrated Development Environment (IDE)
Python Input
Running a Python Script:
Using a Command-Line Interface
The command-line interface is used extensively for running Python code.
Let’s test a few commands by first opening up a Command Prompt or Terminal window, depending on the operating system that you are working on.
Typing the
python command in your command-line interface will initiate a Python interactive session. You will see that a message appears informing you of the Python version that you are using.
Python 3.7.4 (default, Aug 13 2019, 15:17:50)
[Clang 4.0.1 (tags/RELEASE_401/final)] :: Anaconda, Inc. on darwin
Type "help", "copyright", "credits" or "license" for more information.
Any statements that you write in your command-line interface during an interactive session will be executed immediately. For example, typing out 2 + 3 returns a value of 5:
Using an interactive session in this manner has its advantages, because you can test out lines of Python code easily and quickly. However, it is not the ideal option if we are more interested in writing lengthier programs, as would be the case if we are developing a machine learning algorithm. The code also disappears once the interactive session is terminated.
An alternative option would be to run a Python script. Let’s start with a simple example, first.
In a text editor (such as, Notepad++, Visual Studio Code or Sublime Text), type the statement
print("Hello World!") and save the file to test_script.py, or any other name of your choice as long as you include a .py extension.
Now head back to your command-line interface and type the
python command, followed by the name of your script file. Before you do so, you might need to change the path to point to the directory that contains the script file. Running the script file should then produce the following output:
python test_script.py
Hello World!
Let’s now write a script file that loads a pre-trained Keras model and outputs a prediction for this image of a dog. It is often the case that we would also need to pass information to the Python script in the form of command-line arguments. For this purpose, we will be using the
sys.argv command to pass to the script the image path and the number of top-guesses to return. We could have as many input arguments as the code requires, in which case we would keep on reading the inputs from the argument list.
The script file that we will be running now contains the following code:
In the above code, we read the command line arguments using sys.argv[1] and sys.argv[2] for the first two arguments. We can run the script by making use of the python command followed by the name of the script file, and further passing it as arguments the image path (after the image been saved to disk) and the number of top guesses that we would like to predict:
python pretrained_model.py dog.jpg3
Where pretrained_model.py is the name of the script file, and the dog.jpg image has been saved into the same directory that also contains the Python script.
The generated top three guesses are the following:
But there can be more in command line. For example, the following command line will run the script in “optimized” mode, which the debugging variable __debug__ is set to False and assert statements are skipped:
python-Otest_script.py
and the following is to launch the script with a Python module, such as the debugger:
python-mpdbtest_script.py
We will have another post about the use of the debugger and profilers.
Using Jupyter Notebook
Running a Python script from the command-line interface is a straightforward option if your code generates a string output and not much else.
However, when we are working with images, it is often desirable to generate a visual output too: we might be checking the correctness of any pre-processing that is applied to the input image before feeding it into a neural network, or visualising the result that the neural network produces. The Jupyter Notebook offers an interactive computing environment that can help us achieve this.
One way of running a Python script through the Jupyter Notebook interface is to simply add the code to a “cell” in the notebook. But this means your code stays inside the Jupyter notebook and cannot be accessed elsewhere, such as using the command line as above. Another way is to use the
run magic command, prefixed by the
% character. Try typing the following code into a cell in Jupyter Notebook:
%run pretrained_model.py dog.jpg3
Here, we are again specifying the name of the Python script file, as pretrained_model.py, followed by the image path and the number of top guesses as the input arguments. You will see that the top three predictions are printed beneath the cell that produced this result.
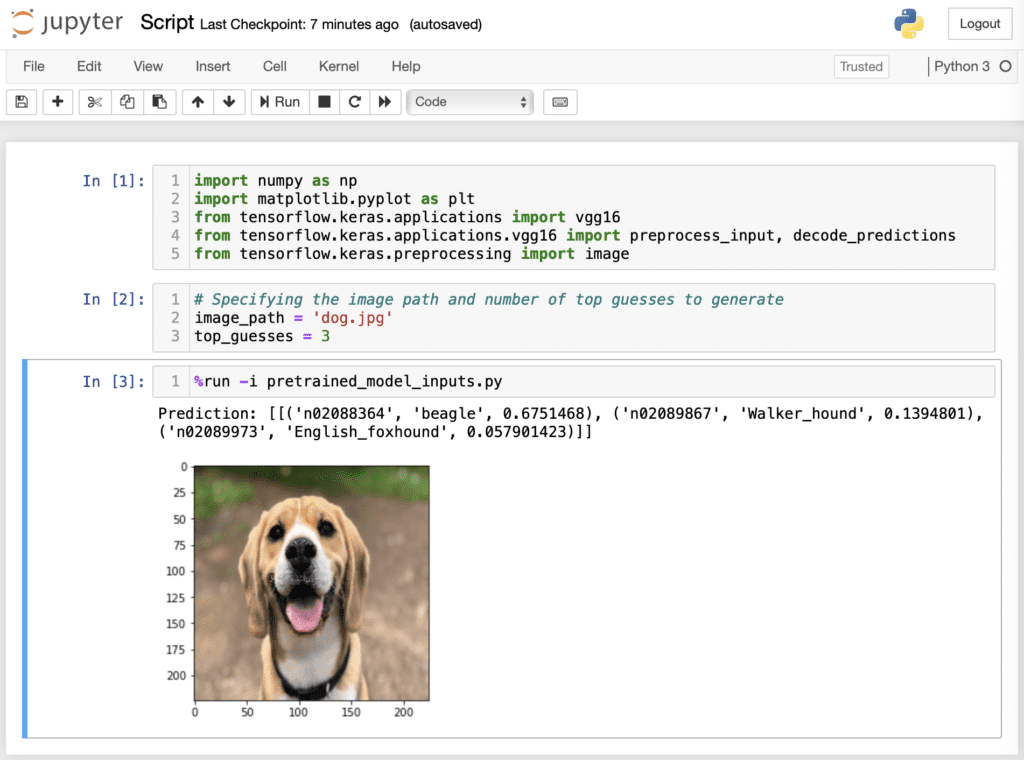
Now, let’s say that we would like to display the input image in order to check that it has been loaded according to the model target size. For this purpose, we will modify the code slightly as follows and save into a new Python script, pretrained_model_image.py:
Running the newly saved Python script through the Jupyter Notebook interface now displays the resized $224 times 224$ pixel image, in addition to printing the top three predictions:
%run pretrained_model_image.py dog.jpg3
Running a Python Script in Jupyter Notebook
Alternatively, we can trim down the code to the following (and save it to yet another Python script, pretrained_model_inputs.py):
1
2
3
4
5
6
7
8
9
10
11
12
13
14
15
16
17
18
19
20
21
22
23
# Load the VGG16 model pre-trained on the ImageNet dataset
vgg16_model=vgg16.VGG16(weights='imagenet')
# Load the image, resized according to the model target size
And define the input variables in one of the cells of the Jupyter Notebook itself. Running the Python script in this manner would require that we also make use of the
-i option after the
%run magic:
%run-ipretrained_model_inputs.py
Running a Python Script in Jupyter Notebook
The advantage in doing so is to gain easier access to variables inside the Python script that can be defined interactively.
As your code grows, combining the use of a text editor with Jupyter Notebook could provide for a convenient way forward: the text editor can be used to create Python scripts, which store code that can be reused, while the Jupyter Notebook provides an interactive computing environment for easier data exploration.
Using an Integrated Development Environment (IDE)
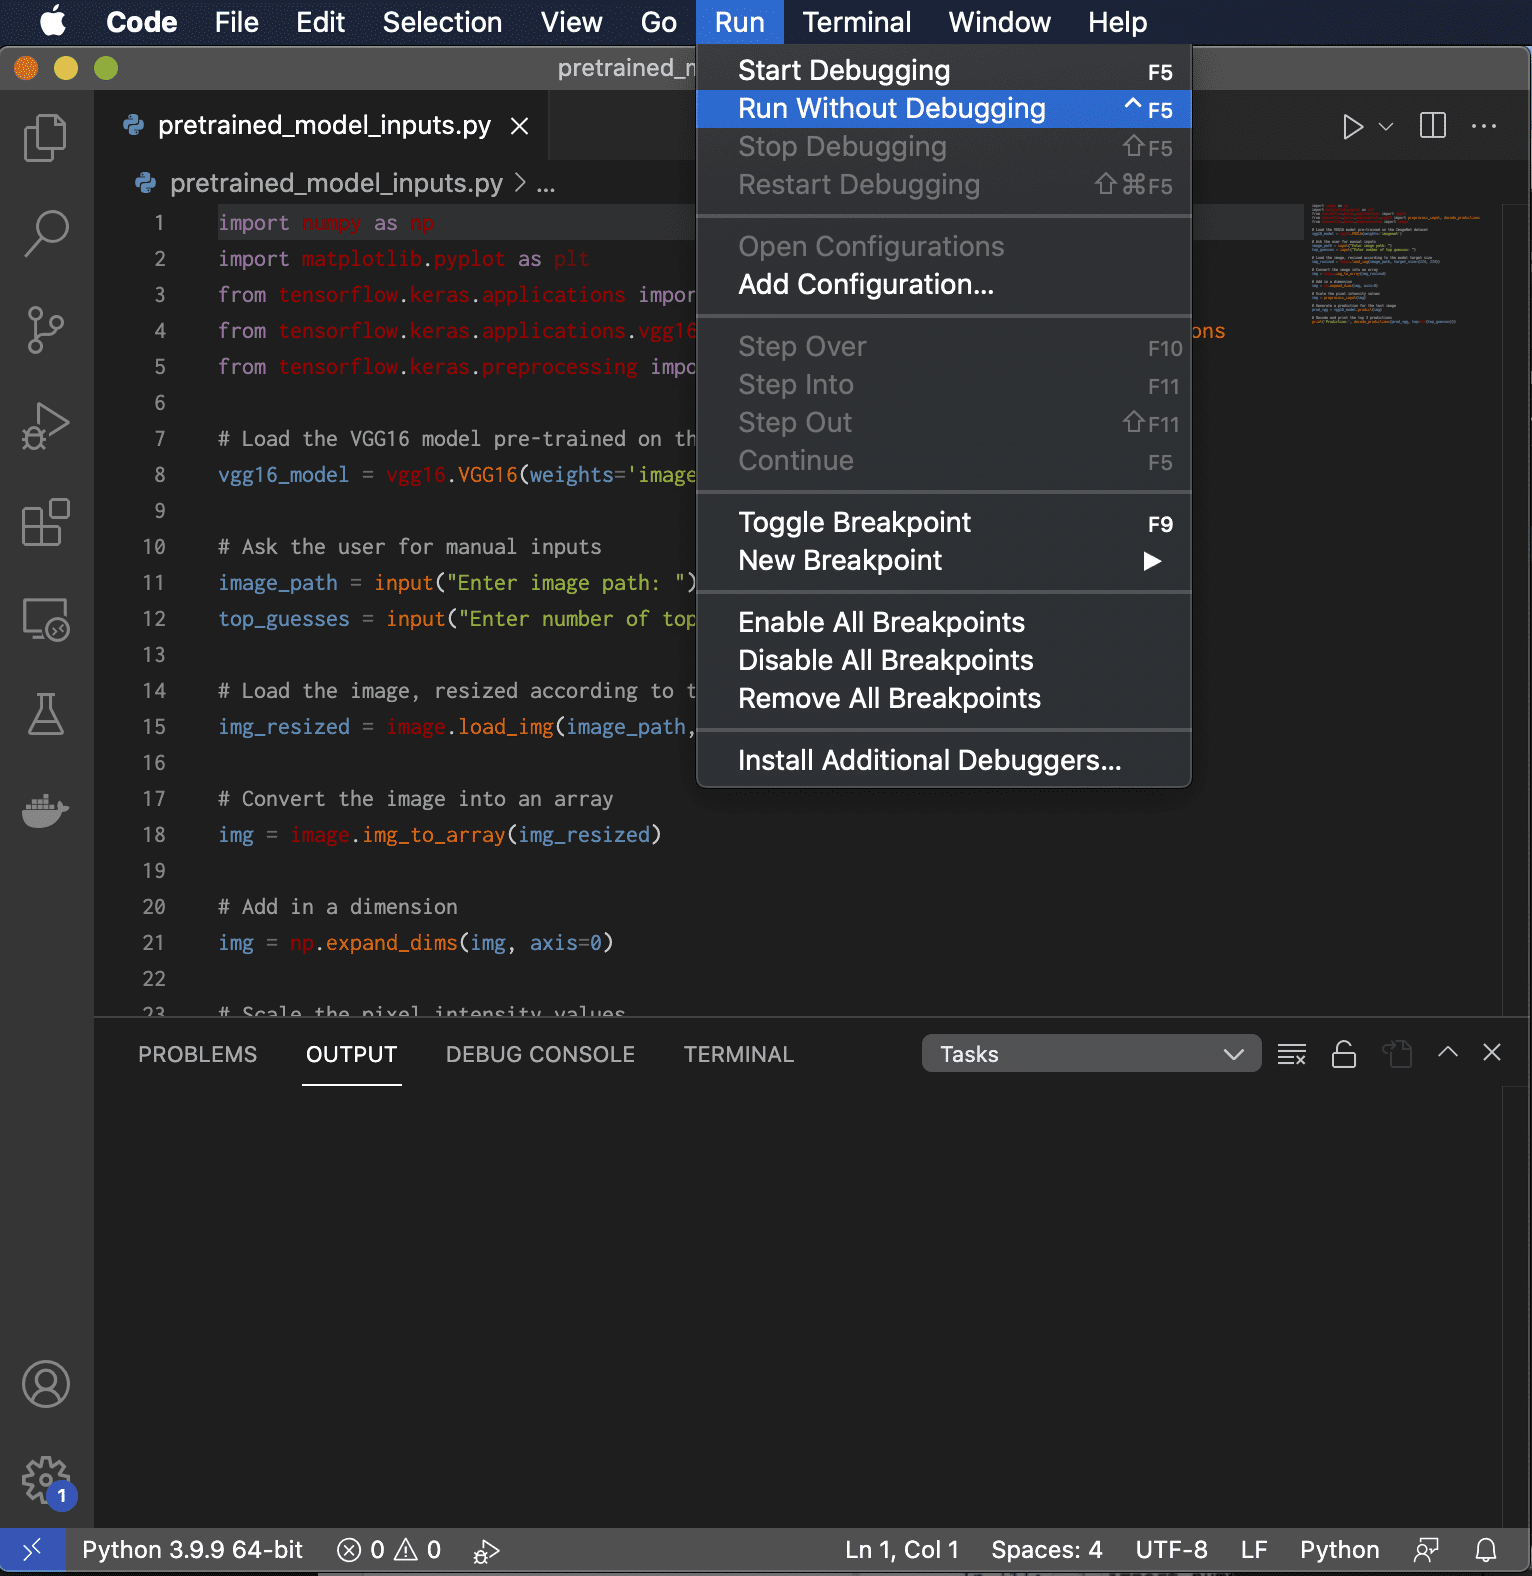
Another option is to run the Python script from an IDE. This requires that a project is created first and the Python script with a .py extension is added to it.
If we had to consider PyCharm or Visual Studio Code as the IDE of choice, this would require that we create a new project, and subsequently choose the version of Python interpreter that we would like to work with. After adding the Python script to the newly created project, this can be run to generate an output. The following is a screenshot of running Visual Studio Code on macOS. Depends on the IDE, there should be an option to run the code with or without the debugger.
Python Input
We have, so far, considered the options of passing information to the Python script by means of the
sys.argv command, or by hard-coding the input variables in Jupyter Notebook before running the script.
Another option is to take an input from the user through the
input() function.
Here, the user is prompted to manually enter the image path (the image has been saved into the same directory that also contains the Python script and, hence, specifying the image name is sufficient), and the number of top guesses to generate. Both input values are of type string, however the number of top guesses is later casted to an integer when this is used.
No matter if this code is run in the command-line interface, in Jupyter Notebook or a Python IDE, it will prompt the user for the required inputs, and subsequently generate the number of predictions that the user asks for.
Further Reading
This section provides more resources on the topic if you are looking to go deeper.
Books
Summary
In this tutorial, you discovered various ways of running and passing information to a Python script.
Specifically, you learned:
How to run a Python script using the command-line interface, the Jupyter Notebook or an Integrated Development Environment (IDE).
How to pass information to a Python script using the
sys.argv command, by hard-coding the input variables in Jupyter Notebook, or through the interactive use of the
input() function.
Do you have any questions?
Ask your questions in the comments below and I will do my best to answer.